Excel Add-In help
- After installing our Excel Add-In, open Excel sheet and navigate to "TEXT2DATA" tab,
- Make sure you have created free account in our service. When this is done, you should get your API key in your admin panel. You should also set-up API secret before starting analysis,
- Having API credentials created, navigate to Excel and update the data by clicking "Service Credentials" button,

- To analyze the data, right click on Excel cell or range of cells and select desired analysis
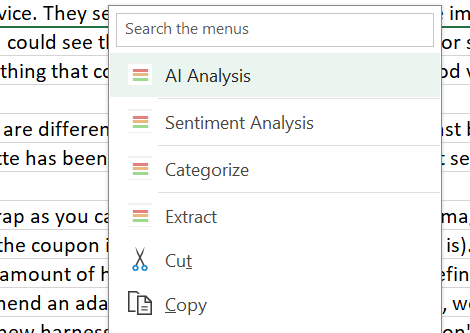
- You can also use the button on the Excel ribbon section (TEXT2DATA tab) (as some other Excel add-ins may reset right click menu),
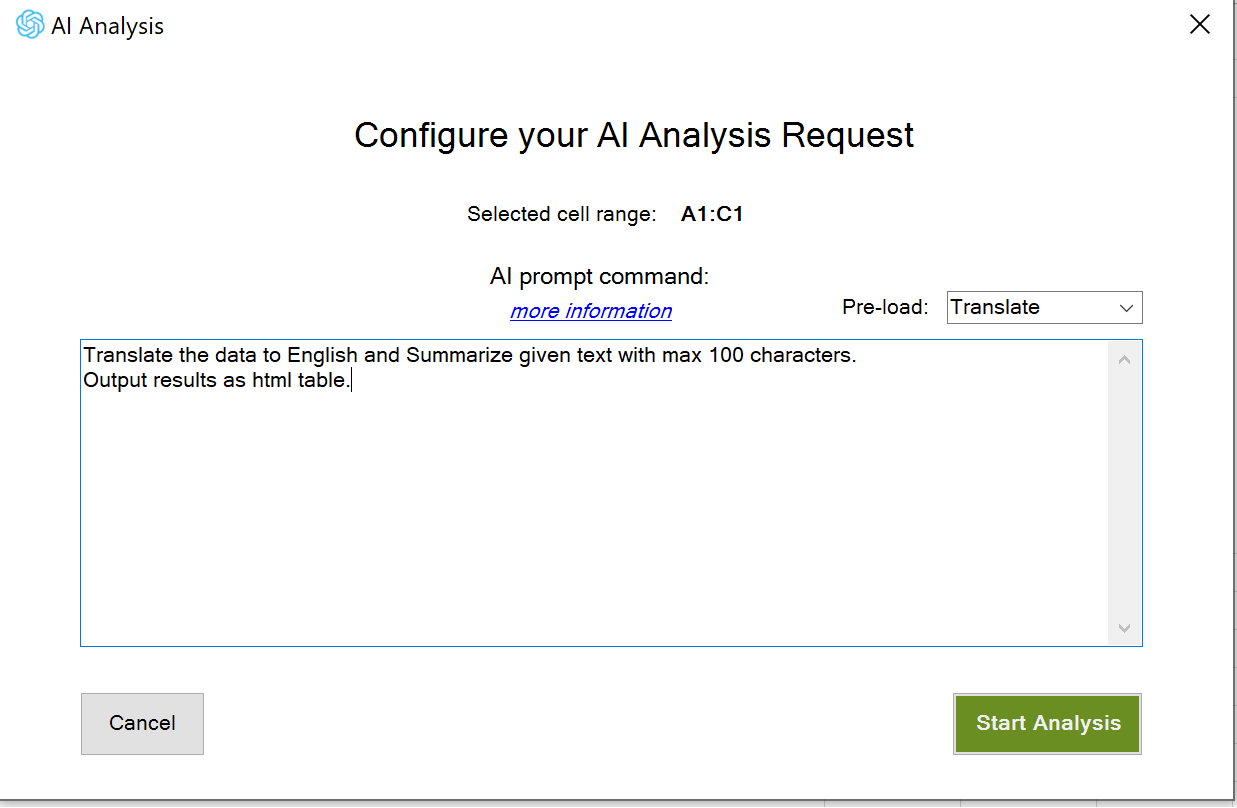
- When choosing AI analysis, additional form will appear. You will have to configure AI prompt there before starting,
- Clicking "Sentiment Analysis" you will run sentiment analysis using TEXT2DATA's proprietary model,
- Clicking "Categorize Selection" button in top menu, will start quick document categorization process (without analyzing sentiment) - if no custom model name is specified (in service settings), the default user classification model will be used,
- When clicking "Extract from Selection" button in top menu, the entity extraction process will start (without analyzing sentiment) - if no custom model name is specified (in service settings), the default user extraction model will be used,
- During data processing, right action pane will open (you can dock it to any position you want),
- Text content in each Excel cell is treated as a separate document and evaluated as such,
- The better input text is formatted (properly placed commas, spaces between sentences etc.), the faster and more accurate analysis will be returned,

- When analysis is done, just use "Paste to selection" or "Copy to new Worksheet" buttons,
- Additional option lets you create word cloud based on analysis results,
- You can also generate summary statistics containing total sentiment counts, auto categories and user categories (if you have created custom classification models),
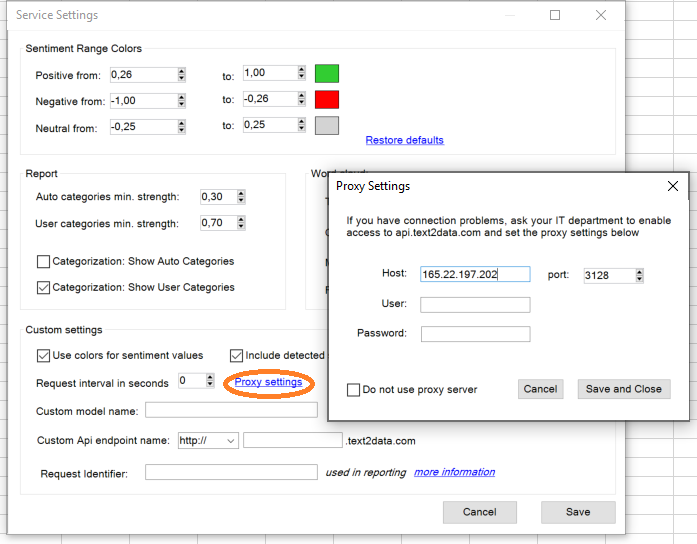
- Sentiment colors can be customized in "Service Settings" options,
- If you have pre-trained custom classification models, type it's name into "Custom model name" textbox under "Service Settings" - leave this field empty to use your default model if any is created,
AI prompt
AI prompt lets you tailor analysis results to your expectations.
You might provide multiple commands in a single request. For example you can ask to translate the text
and summarize it shortly after translation. You might also ask to output the results in a specific format e.g. as the HTML table.
The pre-load menu has handy prompt templates for quick use. There are also 3 custom prompt types available which you can use to store your own prompts that you use most often (they will be saved after each change).
Proxy error
Depending on your local network settings, you might get proxy related error when making requests.
In this situation, try using the Excel Add-In from different network or set the proxy settings. In order to do that, go to "Service settings' and click 'Proxy settings' link:
Problems opening analysis pane
In a situation when the Excel-Add-In is properly installed but after clicking analyze button, the analysis pane is not opening, please make sure the other Excel Add-Ins do not interfere with ours.1. Make sure you have only one instance of Excel open.
2. Please go to "Excel => File => Options => Add-Ins" and click Manage Excel Add-Ins.
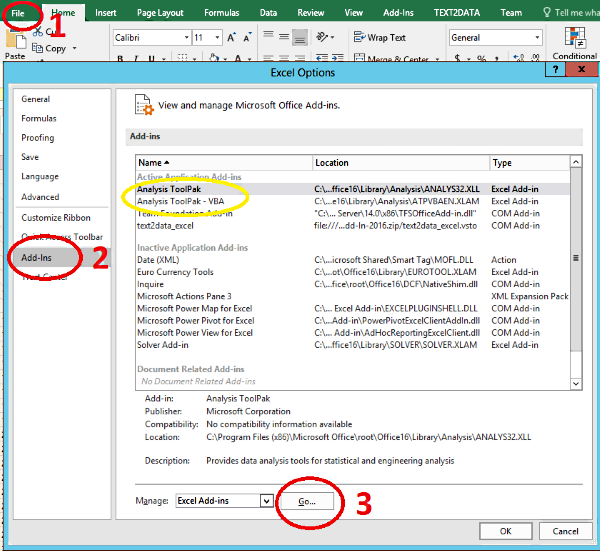
3. Disable all active Add-Ins.
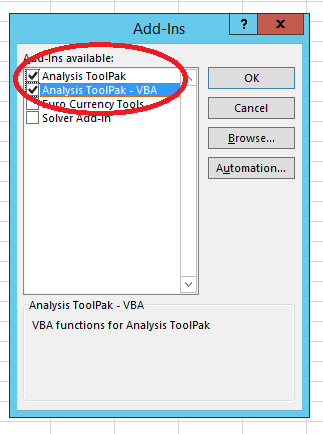
4. Click OK.
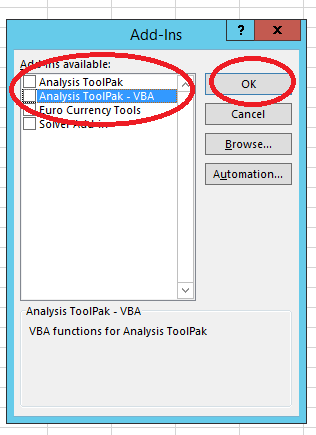
5. Next, re-start the Excel.
